 Garage
Optimize Your MX Suspension: A Guide to Basic Adjustments
Learn how to adjust the preload, compression, and rebound on your motocross suspension. A simple guide to improve your performance, comfort, and confidence on the track.
Optimize Your MX Suspension: A Guide to Basic Adjustments
Hey rider! Do you feel like your bike is beating up your arms, feels unstable in fast sections, or dives too much under braking? There's a good chance it's due to a poor motocross suspension setup. People often think this is just for pros, but don't be mistaken! Understanding and adjusting your suspension is the key to more comfort, safety, and speed. And it's not as complicated as it sounds. We'll explain the basics: preload, compression, and rebound.
Step #1: Preload (aka the famous "Sag")
Before you even touch the little screws (the "clickers"), the very first thing to do is set your preload, also known as "sag." Sag is the amount the suspension compresses under the weight of the bike and the rider. It's the starting point for any good setup. If your sag is off, all the other adjustments you make will just be compensating, and it will never be quite right.
Why is it so important?
Properly adjusted sag ensures your bike has the correct geometry. It allows the wheels to stay in contact with the ground in holes and over bumps, giving you maximum traction and stability. Basically, it’s the foundation of your bike's handling.
How to set your sag?
It's easier than it looks. You'll need a friend, a measuring tape, and a bike stand. The goal is to measure the rear shock's compression. For most full-size MX bikes, you're aiming for a rider sag between 95mm and 105mm.
- Step 1: Put your bike on a stand with the rear wheel off the ground. Measure the distance from the rear axle to a fixed point on your rear fender. Write down this measurement (this is your "L1" measurement).
- Step 2: Put the bike back on the ground. Get on it in your full gear, standing on the pegs in an attack position. Have your friend stabilize the bike by the handlebars and measure between the same two points again. Write down this measurement ("L2").
- Step 3: Calculate your sag: L1 - L2 = Sag.
If the value is too large (more than 105mm), you need to tighten the shock spring (increase preload). If it's too small (less than 95mm), you need to loosen it. Check your owner's manual to see how to adjust the collar on your shock absorber.
Controlling the Bumps: Compression Damping
The compression adjustment controls how fast your suspension compresses when you hit a bump or land from a jump. It's what manages impact absorption.
Where to find the adjusters?
- Fork: The compression adjuster screw is usually on the top of each fork leg.
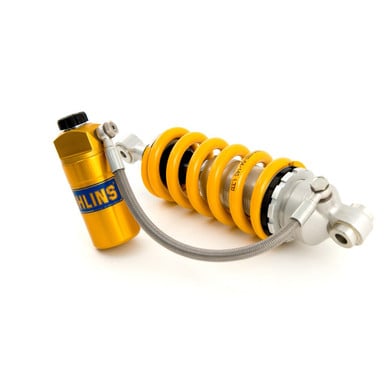
- Shock: You'll find one or two screws on the shock's external reservoir (the piggyback). Often, there's one for high-speed (big impacts, jump landings) and one for low-speed (small bumps, rollers).
How does it feel on the track?
A bad motorcycle compression rebound setting can ruin your day.
- Too much compression (too stiff): You feel like the bike is harsh, it beats up your hands, and deflects off small bumps. To fix this, you need to "open" the adjuster by turning it counter-clockwise.
- Not enough compression (too soft): The bike dives excessively under braking and uses up its travel too easily, potentially "bottoming out" on big jumps. To fix this, you need to "close" the adjuster by turning it clockwise.
Pro tip: Always start from the standard setting recommended in your manual and adjust by 2 clicks at a time until you feel comfortable.
The Calm Return: Rebound Damping
Rebound is the opposite of compression. It controls how fast your suspension returns to its original position after being compressed. This is crucial for keeping your tires glued to the ground.
Where to find the adjusters?
- Motocross fork tuning: The rebound screw is usually found at the bottom of each fork leg.
- Shock: The rebound adjuster is almost always at the bottom of the shock, near the linkage.
How does it feel on the track?
- Rebound too fast (too open): The bike has a "pogo stick" effect. The rear end kicks you on jumps, and the bike feels unstable and nervous. To slow down the rebound, turn the screw clockwise.
- Rebound too slow (too closed): The suspension doesn't have time to extend between successive bumps. It sinks deeper and deeper into its travel and eventually becomes very harsh. This is called "packing." To speed up the rebound, turn the screw counter-clockwise.
Our Tips for Nailing Your MX Suspension Tuning
Take notes: Keep a small notebook to write down your starting settings and every change you make. This will prevent you from getting lost.
One change at a time: Don't adjust compression, rebound, and preload all at once. Make a single adjustment, go ride a few laps to feel the difference, then adjust again if needed.
Your manual is your best friend: It contains the baseline settings recommended by the manufacturer. It's always the best place to start.
Ready to transform your machine's handling? A good suspension setup is the most effective and least expensive performance modification you can make. If you need tools, suspension fluid, or parts, we have everything you need. Shop on MathiasPowerParts.com and don't hesitate to contact us if you have any questions!
💬 Comments (0)
Sign in to leave a comment
Sign inLoading…
Recommended by the author